Archived writing sample. Originally published by Overlander.com on July 27, 2022. Imported from the author’s WordPress archive for review.
Originally published in 3 parts on Overlander.com August 2022 (now defunct)
By Patrick Rich Wednesday, July 27, 2022
PART 1
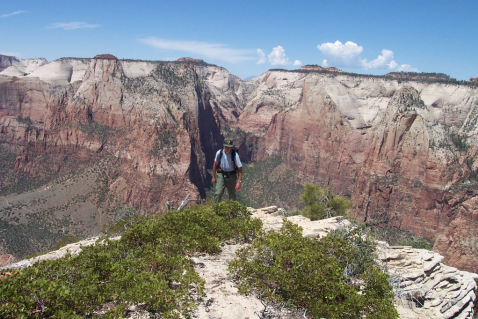
“I mostly just listen for the rope. I don’t think people really realize how blind I am.” Not what you expect, to hear from your guide setting a rapel halfway through a technical slot canyon In Zion National Park. Eric, a friend of my then-new father-in-law, had been a park ranger here in Zion for most of his life and knew these canyons inside and out. His knowledge of the canyons offset his macular degeneration, which left his peripheral vision and attacked his center vision which I had just learned was worse than he let on. Average height and probably didn’t weigh more than 150 lbs he was fast, confident, and surefooted on the trail and never missed a step in setting up his lines. Eric was a product of the desert environment he’d spent his life in and the wealth of his practical knowledge would be hard to put a value on.
Like Eric, the desert is my home; Born and raised here of pioneer ancestry. I’ve been here about 40 years and I honestly can’t imagine my life anywhere else. I am a desert rat and I love it. And while I don’t yet possess a lifetime of practical experience the way Eric has, I have adapted my life to live and play here. Sometimes when I travel to popular parks like Zion or Arches I see the diversity of license plates and faces wandering around and I like to put myself in their shoes and imagine this place through fresh eyes. What kind of thing it must be to see these wonders which still fascinate me for the first time!
Seeing a lot of first timers I often see people unfamiliar with the desert who - lets say it kindly - make it obvious and it’s a little painful to watch. It’s not that I can blame them, put me in the everglades, the northwest or even a big city and I am equally out of my element. This ranges from silly to annoying and even dangerous. The internet if full of stories of people who didn’t respect the desert and paid too high a price.
This guide series is aimed at imparting things that I’ve learned in the desert with people who want to come see the place I fall in love with over and over. There will be 3 parts each aimed at a different aspect of general information, safety and travel. Even though I’ve lived in the desert for 40 years I am not the final word on it. Please comment with tips you’d want others to know about how to enjoy the desert safely and with respect and stewardship.
**CLIMATE **
This seems like an obvious place to start. In this section much of what I will address will be targeted towards people who may be new to the desert generally. Some of it may be fundamental, but there are some good tips in here too I promise.
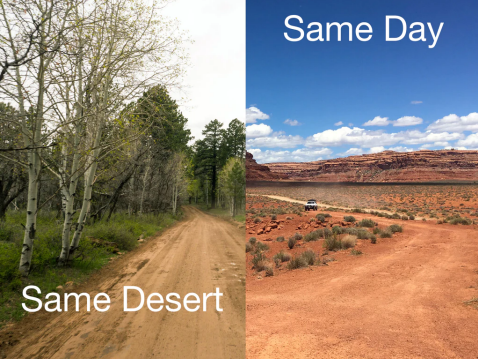
A desert is any place that is arid and normally sparsely vegetated. Yes, that means sand dunes, cactus, and slickrock, but it also means high altitude plains and forested mountain ranges. The climate of the “desert” varies greatly with elevation and latitude, with the only constant being low rainfall, and low humidity. This low humidity has a couple of unique effects you may not be used to.
**TIP - Things dry fast in the desert. Wet clothes and towels dry in minutes and food left out will quickly desicate. **
This lack of moisture means that the air and soil won’t hold onto the heat. The upside of this is that 90 degrees in the desert feels a lot more tolerable than 90 degrees in, say, Florida. The downside is that you feel cooler because your sweat is evaporating and drying you out. More on that later. Another effect, is that the the temperature changes quickly between day and night. Many people who come to the desert aren’t prepared for the wild temperature swings that are an everyday occurrence. Expect an average swing of about 30-40 degrees F from high to low with extremes of 70 or more degrees from day to day. That means it could be 95 during the day, and freezing in the morning. On that note, the coldest time of day in the desert is first thing in the morning. Plan your wardrobe and breakfast plans accordingly. The high desert particularly sees wild swings in temps. Even in the summer, something warm for the mornings is advisable.
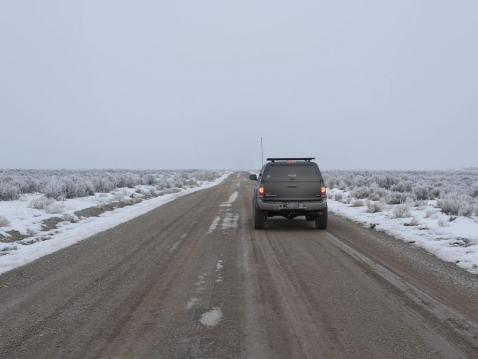
**TIP - Do your most intense outdoor activities like biking or hiking early in the day and do your less intense or indoor activities (driving) during the heat of the day. **
In the high deserts, afternoon thunderstorms are common during the summer months. Then tend not to rain a lot or last long but they can be intense.
NOTE - The old adage about counting seconds between lightning and thunder to determine your safety from lightning is inaccurate. Lightning can travel dozens of miles. If you can see lightning and hear thunder it can hit you, though obviously it’s less likely the further away it is. **You can take my word on this. **
If there is one rule when it comes to desert weather, it’s that almost anything can happen. Sunny and hot one day, snow the next morning. When it does rain, it typically rains for short bursts. The higher you go, the more extreme the change. Use weather forecasts as a broad guide and check for updates often as they are very likely to change last minute.
**TIP - NOAA weather alert radios can be found in many off-the-shelf radios and even in some cars (Subaru used to have this a feature of their radios in the Outback). You can get these radio broadcasts almost anywhere with cheap handheld radio and they can give you updated forecasts and alerts. **
Something you may or may not know about weather forecasts is that the percentage chance of precipitation isn’t how likely it will rain, it means what percentage of the forecast area is likely to get rain. The forecast may only say 20% chance of rain, but you may be in the lucky part of the forecast area that gets that rain, and it might be a lot of it. Because there is a lot of open space in the desert, forecast areas can be quite large. My encounter with lighting happened on a 20% chance of rain evening.
TIP - APRS.FI **is a free amature radio interlink system that includes automated weather stations all over the world. On the map there are blue circles with “WX”, which if you click on you can see real time weather data transmitted by VHF to the internet. After clicking on a station you can click on “show weather charts” for a historical trends for the day, week, month or year including barometric pressure, wind speed and gusts, rainfall and even solar output. These weather stations may give you a much more local idea of the weather. **
When it does rain in the desert, the land almost always reacts dramatically. Rivers, washes and waterfalls may suddenly form or swell carrying a lot of material with them. Perfect dirt roads may become completely impassible to even the most well equipped traveler and/or the road may cease to exist. I will go into this more in the SAFETY section.

When choosing campsites always look to see where water would run. Pitch your camp/tents away from any low spots or obvious washes. They might be dry now, but they could be feet deep in 30 minutes if it pours. Never camp in a large drainage (you’d be surprised how often I see this)! Avoid camping in narrow canyons unless they are well established campgrounds with islands of safety.
**TIP - Look around your campsite for signs of recent water activity. Banks of sand built up, weeds laid over, sticks in the weeds, sandy channels, etc. This is a good indication of what the water did the last time it rained and where it’s likely to go again. **
PUBLIC LANDS
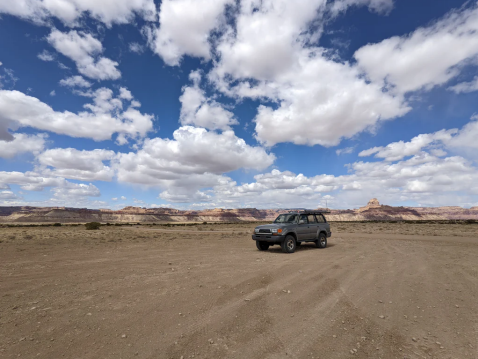
One of the best things about the west is an abundance of public lands. Utah is 70% public lands, as an example. This means a lot of open trails, wilderness, primitive camping and open space. What this does NOT mean is that it’s a free-for-all land of lawlessness.
First, there are many kinds of public land. Bureau of Land Management (BLM), state and national forests, state parks, national parks, national monuments, etc. They all have unique rules and expected conduct. The southwest is also is home to a lot of government land this is NOT open to the public such as training ranges and test areas. Get a good map, and head posted signs.
It’s import to emphasize the point that “public” does not mean “yours” it means “ours”. If we were roommates and I trashed the place because it suited my needs, I would be a terrible roommate and you would probably want me out. Locals and people who love the land are going to feel the same way if you abuse our lands.
Specifically, DO NOT:
Trample the terrain. Flowers, fields, trees - even innocuous looking soil - grows slowly, damages easily and recovers poorly.
Go off-trail. There are plenty of trails and “cross country” driving or hiking “shortcuts” are generally prohibited or frowned upon.
Cut trees or gathering wood (in most places).
Leave trash- including party litter, shooting litter and general trash. Burning it is NOT appropriate (see below)
Take rocks or plant life.
Harass animals, large and small.
Anything that doesn’t leave the spot the same or better than you found it. Remember the next person to use it may be you.
Generally follow leave Tread Lightly principles
The desert may appear barren and void of life, but there are very sensitive micro climates all over that take decades to build and seconds to destroy. Dark patches of dirt which feed plant and animal life and literally hold the soil together are everywhere. While it may look dry or empty, much of the desert is just waiting for water to bloom, but it never will if its destroyed carelessly.
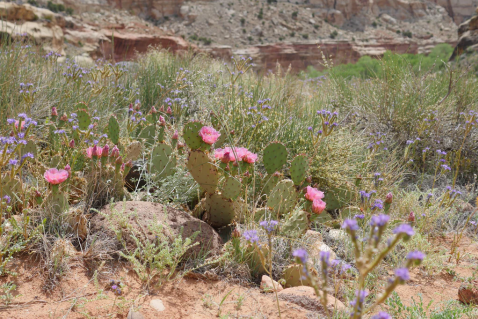
BLM land is multi-use land and the government can and does lease it to ranchers for grazing, or for timber, mineral or other resource extraction operations. These users have certain rights and you must obey posted signs from these users including no trespassing. This also means that you may go to bed one night and wake up to cows in the morning walking through your site. If driving through private land which has a public road running through it, an easement allows for road use to pass through, but no other use. Stay on the road and do not drive, hike or camp on private land! You will also likely encounter fences, cattle guards and gates on public land. Note: Cattle have right of way on grazing land.
**TIP - If you encounter a gate on a public road its most likely to keep cattle in/out and not people. If your route takes you through gated public land, leave gates as you found them. If found open, leave it open. If found closed, open them to pass, then close them behind you (usually closed only with wire or rope or a stone). If the gate is posted as no trespassing, or is locked, do not attempt to bypass the gate or lock. **
State parks, national parks, national monuments, state and national forests all have additional regulations depending on the area. The regulations change area to area so check the blm field office/ranger station for the area you are visiting to get up to date restrictions or special rules. Firearms and pets are prohibited in National Parks, so be advised that simply taking them in could cause problems.
The BLM has interactive and printable maps like this one for Utah that can help you determine what kind of land you are using.
BATHROOMS
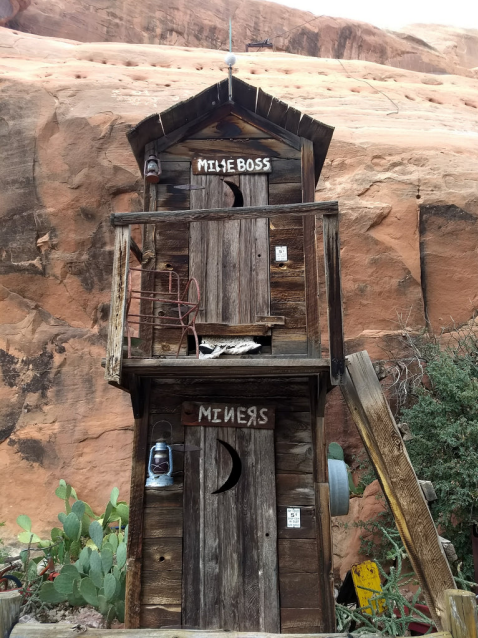
As far as bathrooms are concerned, BLM land, monuments, forests and backcountry areas allow for digging of “cat holes” and burying your waste. Some places do not and you will be required to carry out
EVERYTHING you brought in with you (Canyonlands National Park requires all waste be carried out in the backcountry, for example). Always dig holes 200 feet from water sources, roads, trails and established campsites. DO NOT use “biodegradable” baby wipes, they absolutely do not biodegrade and wash up with every good rain. Use RV or camp toilet paper to aid in biodegradation.
FIRES
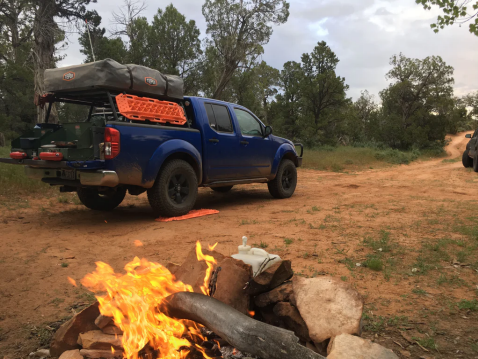
With regards to fires, remember that it’s a desert by definition because its dry. Dry things burn. 85% of fires are human caused and are generally more destructive than natural fires, and that’s just stupid. Especially now as the west is experiencing record aridification, dangerous fire conditions will persist. If you are allowed to have a wood fire always use an established fire ring and try to avoid making additional fire rings. NEVER LEAVE A BURNING FIRE UNATTENDED. I feel like my pal smokey the bear has been after us for long enough for this to sink in but allow me to be more specific on what that means.
1. If it’s smoking or smoldering - it’s still burning.
2. If you see red embers or coals - it’s still burning.
Especially if you are going to bed or leaving camp, put your fire COMPLETELY out. Use water. It will take more water than you think to douse the fire until its wet and completely dead. Don’t bury it, as the low water content of the soil will only hold in heat and does not extinguish the fire quickly. I’ve seen fires restarted in the morning that were buried at night. Also, don’t leave waste in a fire pit. Some trash can be burned, but it’s preferable not to and a lot of trash should never go in the fire. Plastic cutlery doesn’t burn it melts, and paper goods throw off a lot of ash. Never leave glass or metal bottles in the fire pit. The rule is pretty simple really - leave it better than you found it.
As mentioned above, gathering firewood is generally frowned upon or outright prohibited. There simply isn’t a lot of wood in the desert and what little there is is needed to help bring nutrients back into the soil. In high deserts with more wooded areas this may not be a concern but always check with the local field office. In almost every case, cutting firewood is prohibited. The type of wood available is the desert takes a long time to grow and is of poor burn quality anyway. Don’t cut any new firewood.
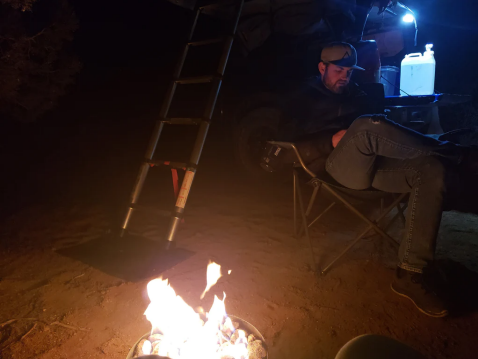
**TIP - Portable propane powered fire rings are cleaner, safer alternatives to wood fires. In many places that prohibit wood fires, these are permitted (be sure to check with a ranger first). They also don’t leave you stinking like smoke. **
**ETIQUETTE **
When visiting the desert something you will notice is space, lots of space. People tend to enjoy the desert for its solitude and stark beauty. Remember this when choosing how close to camp to others, how late and loud your campfire chat goes, whether or not to fly that drone and whether or not to use your bluetooth speaker. Note: Drone flight is NOT permitted in National Parks and many state parks.
**TIP - If you are close enough to others that they can hear your music, it’s too loud or not the right time or place. Your neighbors will thank you for your consideration. While hiking or around people in general is not the time for external speakers as it is seen as extremely rude. Save it for the car or use headphones. **
If you are lucky enough to have a clear night in the desert you won’t want to miss stargazing. Some of the best dark skies are here and the views don’t disappoint. In the same vein as music, keep your light pollution to a minimum and respect early sleepers and late risers.
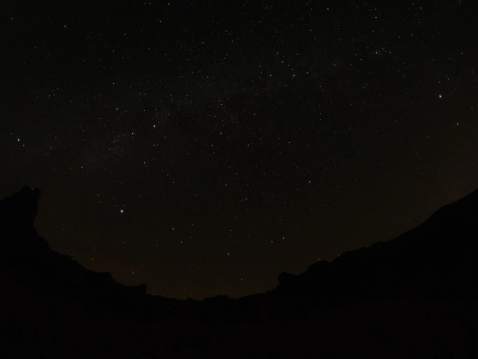
Same goes if you brought toys (quad bike, motorcycles, SxS, etc), keep the speed and noise low in and around camp in established campgrounds or around other campers.
Look, I don’t think I need to spell this out for you, just respect that to many people, myself included, the deserts are a place of spirituality, peace, and awe.
Next time we are going to get into the nitty gritty for staying safe hiking, playing and traveling in the desert. In the meantime, if you’ve been to the deserts post what is it you love most about them.
Look for Part 2 - Staying Safe coming soon.
PART 2
I lived in West Texas for a few years in my teens, I moved in June and was out of the street knocking on doors all day through the summer. As a Utah native I was sure that I was prepared for whatever Texas had to offer. At first everything was fine: I wasn’t enjoying the heat, but I was managing.
I was out knocking doors when I began to notice a headache, but I didn’t think much of it. Not long after I started feeling bad, really bad. My stomach hurt and I had a pounding headache. My partner, a former Marine, noticed that I had stopped sweating and was looking pale and knew right away what he was looking at. He took me to some shade to sit down while he went and got me a sports drink. I chugged the whole thing and realized how thirsty I was, but I didn’t start feeling better. What happened next was me violently returning the red sports drink back to the earth. I didn’t realize it at the time but my decision making and my strength were pretty much shot as well. We limped me home and it took 2 full days of rest and fluids before I felt better.
This was my first experience with dehydration and it only took one time to realize why I didn’t want a second.
Welcome back to part 2 of the this 3 part series on the deserts of the southwest. We are continuing on where we left off with safety.
A reminder that this guide is meant for anyone new to the region and so some things may seem rudimentary or basic. Part 3 will be much more overlander focused, but parts 1 and 2 are things everyone should know.
DRINKING WATER
Overlander.com - Water in the desert
Water is life in the desert and here, especially in the hotter months, you will consume it at a rate you didn’t think possible. The desert is hot, dry, exposed. Here even walking through a river can dehydrate you as the water washes away your salts. So here is the deal:
1. Assume around 1 liter per person per hour for moderate activity depending on the heat, exposure and how much you sweat, up to between 6-10 liters a day. For day hikes, bring about twice as much water as you think you need and you will rarely regret it.
2. If you are traveling remote, understand that there are no guaranteed water sources, even if its marked on a map. Bring extra water and a quality water filter for water water you can find in an emergency.
3. Drink regular amounts, consistently. If you are thirsty your body is telling you it’s past time to drink. You aren’t dehydrated yet, but your body is telling you where things are going. Drink before you get thirsty and avoid chugging water.
4. Remember to replenish your electrolytes. This DOES NOT mean drinking only sports drinks, that will make you sick, I can promise you that. Eat a salty snack, mix in a single sports drink into your water intake, or even have a Coke (but not only soda). Watch for signs of hyponatremia such as headaches, muscle cramps, dizziness, restlessness and fatigue.
5. DO NOT ration water. A common mistake is to delay drinking what water you have in the idea of rationing out your water supply to last longer. This tip came to me from Eric, the ranger at the beginning of part-1, who would tell me stories of people he helped rescue who were badly dehydrated and still had water left to drink. Drink what you have when you need it and your body will function better for longer and you will have a better chance of success than you will rationing. Keeping your body on the edge of dehydration leads to poor performance and decision making.
6. If you’ve stopped sweating. Drink. A general yardstick for knowing if you are drinking too much or too little is the frequency and nature of your water output. Sweat and especially urine. If you have dark infrequent urine or have stopped urinating, you are dehydrated and need water now.
7. Remember that water isn’t the only way to stay hydrated. Most people get a majority of their water from food, so you don’t need to overdo it on water. Stay out of thirst, and drink enough that you function normally.
8. Lastly, alcohol, caffeine and even high amounts of sugar are diuretics and can cause you to lose more fluid than you get from the drink. Keep coffee, soda and alcohol consumption reasonable and remember that they DO NOT replace water.
**TIP - Despite what you may have heard or seen, DO NOT attempt to get water from a cactus. While some breeds have plenty of moisture, it is not water and is more likely to cause severe gastrointestinal distress and diarrhea and make your situation MUCH worse. **
Stay on top of hydration, it can be very easy to ignore early warning signs and you could end up in real trouble if things get worse.
SUN EXPOSURE
The nature of the desert means that you won’t find abundant shade, which means a lot more time in the sun than you might be used to. This has a compounding effect of dehydrating you and burning you. Especially in the high desert you will find that you will burn easily, even on cool or cloudy days. Remember clouds don’t block UV light in a meaningful way.
It may sound counterintuitive but one of the best things you can do is wear clothing with good sun coverage versus less. A natural fabric that breathes well like cotton is better than synthetics unless you sweat heavily or are doing something highly active. If you have any doubts, look around at what the locals and rangers are wearing. Wear light colors to avoid the sun absorbing into your clothing. Wear a hat that covers your face but ideally your neck as well and use quality UV blocking sunglasses. You don’t want to end up having to hear the rope only.
**TIP - Use sweatproof sunscreen, especially on your face unless you like the feel sunscreen in your eyes. Also consider a quality lip balm with sunscreen. **
On the topic of clothing, wear appropriate footwear for the activity. Sandals and flip flops are NOT appropriate footwear for hiking around on rocks, cliffs and terrain filled with pointy things.
TERRAIN EXPOSURE

theme in the local news to hear of people that have been injured or killed acting casually around dangerous terrain. Again, I’m not your mother and I won’t spend a lot of time here but to say a few things.
Especially in popular areas like national parks, dangerous places have a tendency to feel tamed and normalized by the presence of so many people. As if they have been designed, theme park style, to be accessible and safe. Even in remote areas it may feel that there is no risk or immediate danger. Try not to get caught into that line of thinking, as it can lead to serious trouble.
1. Assume that the consequences for mistakes are high even if likelihood is low. 2. Assume that help is far away, because in most cases it is. If you need emergency services, it will be a while when they can get to you, if they can get to you.
3. Don’t rely on your phone as a way to get a hold of help.
Again think consequences as well as probability. The chance of you slipping off the cliff is low, but the consequences are high.
NAVIGATION
Google and Apple both have a history of leading people astray out here and cell service is sparse and unreliable in many places. There are many tools for offline maps like ON X, Gaia or Backcountry navigator that can help keep your bearings in off-network terrain but remember that you have to download areas ahead of time.
Even when the turn-by-turn is working understand that mapping services don’t have up to date road conditions. Google may happily drive you right into a sandy wash if you aren’t careful.
The most reliable option is learning to use paper maps with basic orienteering combined with GPS. A good paper map will have terrain features, major dirt roads and grids with latitude and longitude reference.
**TIP - Most maps feature Lat./Long. but more recently a projection known as UTM, or Universal Transverse Mercator is finding its way onto maps. This system functions very differently to Lat./Long. but is very helpful at determining distances once you learn the basics and can be very helpful at quickly identifying rough position and distance to waypoints. **
On your map be sure to note what types of roads are and how they are marked. In some cases a “road” may look like an easy, scenic drive but it could be a trail that would challenge even a well equipped overlander.
There is a campground, for example, near chesler park in the Needles district of canyonlands called Devils kitchen, which you can reserve online. There is a clear and obvious road on the map that will take you right to it.
What it looks like on the map.


very rough. The 2nd time I did this trail I ran into a couple in a rented Jeep about a mile in who were very upset. They had rented the site online but didn’t find out until they picked up their permit that the “road” to the campsite was actually a rated trail. To their credit, the park ranger is required to tell you this is a trail and make an assessment about your skills and vehicle, but it’s a very, let’s say, “informal” assessment. This trail is rated 5 (out of 10 in the Moab area) for difficulty and its recommended to have 33 inch plus tall tires, a locker and intermediate off-road driving skills. This couple were NOT please with this revelation. We spotted and guided them through and told them of a more leisurely (but much longer) exit if they didn’t want to come back this way.
All this to say that in the desert, all roads are NOT equal on a map. If you are planning a route, make sure you understand what you are getting into before commiting.
**TIP - Local field offices/ranger stations are your friend. They will usually have free maps and may have lots of good local and recent knowledge of the area and road conditions. The people are almost always very friendly and helpful. **
**DRIVING **
Don’t be tempted to take shortcuts or scenic routes without being equipped with some research and preparedness. Some roads will be seasonal, some will have requirements such as 4x4 only, or high clearance 4x4, and some may not exist at all anymore.

trouble so long as the conditions are right. If it says “4x4 and/or high clearance required”. You should assume that it definitely means what it says.
Some 4x4 roads may not be marked at all. Use your better judgement and don’t press on if the trail starts to exceed your comfort zone. The chances are that the road will get worse, not better.
**NOTE: AWD isn’t necessarily 4WD. While I agree with the Society of Automotive Engineers (SAE) that the correct terminology for anything that drives all of its wheels is AWD (with categories that define each group), I respect that there is a universally accepted distinction between the two. The big distinction, for our purposes, is that AWD isn’t meant to be used off-road continuously or strenuously. **
There are 3 major driving hazards in the desert
- Deep sand
2. Clay
- Water
SAND
Deep sand can be found in almost every desert climate and sometimes in the least expected places and
many people get caught out by this every year. If there is one thing you need to know about driving over sand its tire pressure. Too many people get stuck in the sand when it could have been easily avoided with a cool head and a little work. I will go over advanced sand driving methods in the last part but know that getting air out of your tires in the sand is the number 1 thing you should do to get unstuck or keep from getting stuck.
With lower tire pressure your vehicle’s weight is spread out over a larger area, reducing ground pressure or increase floatation. This floatation keeps you on top of the sand and not digging into it.
The nice thing about airing down is that anyone has the tools they need to do it. While Overlander has lots of great air down and air up tools, you don’t need anything more than a stick or a key to let air out. Depending on your vehicle weight and tire/wheel size you can safely let out quite a bit of air and still drive. A good starting place for sand is about half your street pressure. 32 PSI street? 16 PSI sand. 50 psI street? Well, you get the idea. In extreme cases you can go down as low as 10-12 psi if you drive carefully. Any lower and you risk rolling the tire off the wheel.
With your tire pressure low you MUST drive slowly if you are on dry roads. At sand PSI you shouldn’t travel any distance at more than 30 mph (50 kph). Catastrophic tire damage and or loss of control are real threats.
If you have a compressor, be sure to re-inflate when you are getting back on the road. If not, let air out now and worry about getting back to a gas station to pump back up later. Especially if you get stuck, airing down is your first best bet.
Keep a steady pace in sand and avoid stopping, especially on hills. If you have to stop on sand, be sure to stop where getting going again won’t be an uphill battle.
**TIP - Be advised that tire “inflators” are not compressors. I’ve seen so many dead “inflators” trying to air up a car tire and dying before they get there. I even saw someone using a bicycle pump because it was working better than their cheap inflator. Inflators are for bikes and toys, not for car tires. They may be better than nothing…but not by much and even that’s not a guarantee. **
If you feel your vehicle starting to lose a traction battle with sand, STOP before you dig in too deep. Simply get out, let out half the air in your tires, and try again. Traction boards are advisable for overland travel in the sand if possible.
**CLAY **
Some maps and signs may say “impassible when wet”. You should take this warning seriously. Even the most well equipped trail rig will find out how true this is after a good rain. The soil in the desert can be highly variable from loose sand to compacted clay. In the rain, some roads turn into a kind of sticky goo that quickly clogs tires (even mud terrains) and fills wheel wells and will 100% stop you dead in your tracks. It’s the kind of mud where you take a step and bring up about 8 lbs of earth with each step.
**TIP - You can recognize clay roads as usually being a red tone and glossy in sheen when packed down into a road. **
?If you find yourself on a wet clay road, find a safe place to stop and wait it out. Try and find a flat area off the road that doesn’t require you to climb back up onto the road, make sure its not in a low spot or drainage. If you can, look for sand, which will appear rougher in texture or rock. I know it’s tempting to try and power through it, but very experienced people with very good machines will get stuck or slide off these roads. Try to avoid getting close to the edge of crowned roads as you will slip sideways off. This clay will also affect your ability to walk around, but you won’t be as stymied walking as you will driving.
**WATER **
As briefly mentioned in part-1, any significant rain in the desert has the potential to rewrite the landscape pretty dramatically. You would be surprised how quickly and how much water will start to accumulate in drainages, low spots and especially narrow canyons. The hazards range from having to cross new running water to flash flooding. If it starts raining hard, and you are in a drainage (ravine, gorge, wash, etc) you need to consider how you are going to get out, and NOW.
In june of 2022 in Capitol Reef National Park, Capitol gorge flooded after a sudden rainstorm hit the park. The gorges, including popular driven routes, suddenly became rivers and several cars were swept away in less than an hour. The road can go from minivan ready to river in very short order. In this case there was no loss of life, but this isn’t always the case, and it seems every few years there is a news story with fatalities.
HIKING
The above also applies to hikes, perhaps even more so as most hikes in the desert follow or at least cross drainages by their nature. Be aware of your surroundings, look for evidences of recent flooding. In most cases these signs are very obvious - you will see trees and brush bent over, and a clear erosion wall indicating the height of the water flow and its strength.
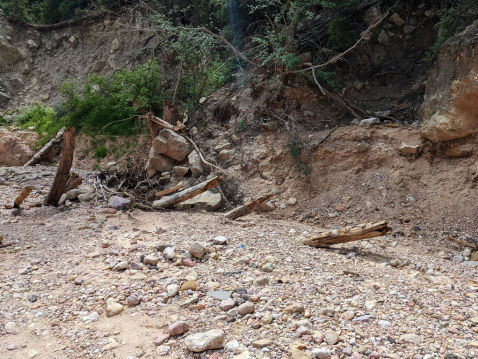
If you pay attention to these signs as you hike you can see where flow is likely. Spot out escape routes where you can get to high ground so you can retreat if you have to. If you are in an area with no clear escape, remember the last place you saw access to high ground. Keep these “islands of safety” in your mind as you hike and watch for signs of flash flooding.
An increase of water flow, especially dark water. It will start slowly and can often come as s slow moving wave pushing debris along with it.
A sudden increase in down canyon wind. If you hear or feel a sudden sustained wind, it’s time to go NOW.
Water coming down canyon walls or forming waterfalls.
Keep an eye on the weather. If you recall part 1 I mentioned to know where water will flow. In the case of flash floods the head waters may be far away from where you are hiking. It doesn’t have to be raining where you are to experience a flash flood. If you are going into a flash flood area check the forecast for the headwaters as well as for the area you will be. Field offices, ranger stations and backcountry offices will have flash flood warnings and weather forecasts for these area. Recalling what I said about the weather in the first part understand that forecasts are highly fluid and that you are responsible for your choices. Go in prepared, watch for signs and remember islands of safety.
**TIP - June and July are monsoon season in the desert and sudden rain storms are more likely. **
Learn to know the signs, act quickly and err on the side of caution. Know where you can escape to, and be prepared to run if you have to.
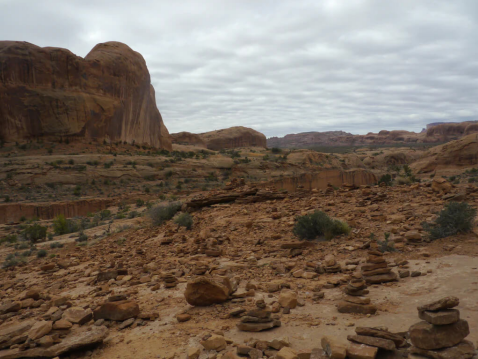
Navigating in the desert can present challenges. Often times there is no “trail” and wayfinding can be difficult. There is a lot of open terrain and the weather can delete obvious paths. The cairn, a pile of rocks stacked by size, is the standard trail marker. A properly marked route will have a cairn every 100 feet or so to keep you on path, more or less depending on how complicated the trail is.
**NOTE: It’s become popular to stack rocks outdoors and on trails. This “harmless” habit can be a real problem for navigation. Please do not stack rocks or create cairns casually, unless you knock them down when you are done. **
CRITTERS
Other things to consider hiking is to watch where you put your feet and hands. During the heat of the day critters are going to find shade, just like you ro me. In the morning or in the cold you will often find them sunning on roads and trails.
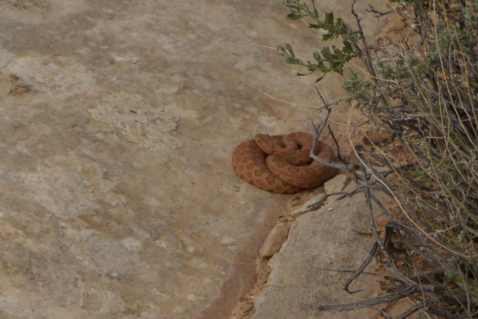
Generally speaking the wildlife isn’t as dangerous as it is made out to be. The critters want the same things you do - a little heat, a little shade, and to not get hurt by other creatures. Scorpions are generally harmless and mostly beneficial. They may find their way under your tent or in a shoe for warmth in the night, however, so just take a minute and check before putting things away or on your feet.
Don’t leave food and trash around at night and be sure to dump your cooking waste and wash water far away from camp (200 feet) to avoid problems. 9 times out of 10 its the birds that will give you trouble with left out food but remember that the desert is a diverse place and some deserts have bears and other large predators like mountain lions. Again, these animals don’t want anything to do with you generally but keep pets and kids nearby in areas where predators have been spotted.
There is a huge diversity of life in the desert and most of it is far more interesting than dangerous, however respect all animal life and keep your distance and remember you are in their home.
There are far too many species and habitats to be able to cover all potential scenarios, so be sure and do a little homework on the areas you will be visiting.
**TIP - The two most dangerous animals you will probably come across are Bison and Moose. These two animals are responsible for way more injury than bear or mountain lion. Moose are very aggressive, and Bison are shockingly good sprinters and jumpers. GIVE THEM SPACE. **
The general takeaway here is that animal life in the desert really isn’t that scary, you just have to make sure you don’t accidentally ruin their day first.
COMMUNICATIONS
A phone is a great thing, but it can run out of batteries, break, become lost or simply have no signal. It’s not a reliable backcountry communication tool.
I am going to cover more specifics in the last section for overlanders there are a few things to consider here.
1. You wont get service of ANY kind inside a narrow canyon. Not satellite, not cell, not radio (for the most part). Not even GPS signals. This includes SOS messages from rescue beacons.
2. Two way radios are line of sight. It doesn’t matter what the package says -15 miles, 25 miles…50 miles! Not realistic. Under ideal conditions on a perfectly smooth earth a person holding a handheld can expect about 7 miles between radios tops. My personal best was a semi-scratchy 7.3 mile chat with a 200 feet elevation difference. Expect 2-3 miles, 5 tops.
As you get into more advanced radio communication, many more options open up, as does your range. You can read more about your options in my overland trail comms writeup.
**NOTE: Although Park Rangers have and monitor radios, they are not public frequencies and you cannot call them directly. **
One of the best communication methods you can use here is the simplest - pen and paper. If you are going to take a hike in a remote area, leave a note on your car with your departure time, estimated return time (if you can guess) and the number of people in your party and even a contact number. On well established hikes there is typically a logbook for this. Put down your car (plate), how many are in your party and when you left. Be sure to log a time out when you get done. This helps people find you if you become lost and to know to look for you if your car is still there long after it should be. You can also include a radio frequency or channel if you want to have a better chance of making contact - just be sure to also include any privacy channels you are using as well.
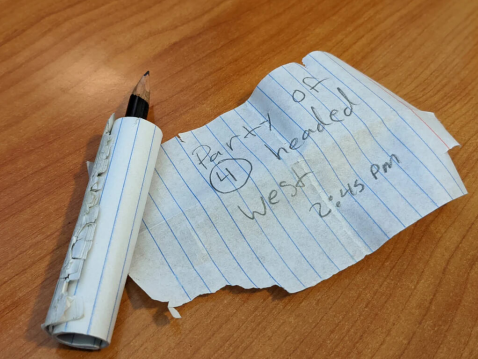
**TIP - Consider adding pen and paper to your carry items. A mini pencil with a roll of paper wrapped around it take up no space at all and costs next to nothing but can convey a lot of information. **
**EDC **
While we are on the topic, I would recommend a few EDC (Every Day Carry) items to consider having with you on any outing. At a minimum I would say a small knife, a small flashlight and a pencil and paper.
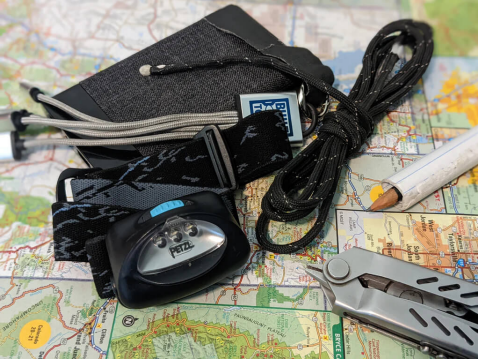
I like to switch out a knife for a multi-tool and a flashlight for a headlamp. I’d also add a small amount of cord and a phone charger with universal cable. I actually carry more than this in an EDC bag that I throw in my pack which contains a little cash, some survival tools (blanket, fire starting materials), some basic medicine, tape (med and heavy duty), a compass and some spare batteries for headlamps or flashlights.
EDC is a topic that is very personal as everyone seems to have their own “must have” kit. Mine works for me and was built from my experience and may not work for you. I would love to hear your favorite tools you wouldn’t go into the desert without in the comments.
This was a long one, as you can probably guess, safety in the desert is something I consider pretty important. Even still I feel like there is a lot that I left out. Some of which is going to come back in the last section, but what do you think? Did I miss something important?
PART 3
So far in this series, we’ve covered a variety of general desert topics from climate and public lands to safety and basics on communications and terrain. In this final part of this series, I want to go into more details on terrain management and driving, dive deeper into gear and technical items, and go over things you will and won’t need on your trip through the desert.
Let’s pick up where we left off in safety with regard to the terrain. To reiterate one more time - Empty desert roads are not a personal playground. It’s tempting when you see open stretches of desert to go full baja mode and I get it, but you probably shouldn’t, and here’s why.
First, most of these roads and trails were originally mining/mineral resource roads or service roads for ranching and grazing and many are still active as such. Private users may have a vested interest in their access and in their safe use. Remember that these roads may be necessary for someone’s livelihood. They may invest their personal time and money into the maintenance of them and in any case, all sorts of users could be out on these roads. If this is a leased grazing area you can also assume you will find animals when and where you least expect them. You would be surprised what is grazing land in the desert. Don’t assume an empty road is a deserted road.
There is an ongoing tension between recreational users and professional or commercial users. Be a good ambassador for recreational users and don’t give anyone any reason to close trails or restrict access.
Second, the terrain changes FAST and you probably won’t see the changes coming. I’ve driven thousands of miles on a variety of desert roads and trails and I am still caught out unexpectedly with a dip that is bigger
than I thought, or that goes a different direction than I was expecting, or that increases its radius sharply. I’ve hit my stops hard and I’ve nearly gone off-trail more than once. More than that, you don’t know who or what is around that bend or dip. Don’t be the cause of ruining someone else’s day. With that in mind, here are a few guidelines for desert travel.
Don’t go faster than you can see.
Aired down? Speeds down.
Use 4WD high range and/or center differential locked on loose roads even if you don’t need 4WD traction. Tying axles together will give you a better balance for emergency maneuvers, reducing snap oversteer which will get you into more trouble more often than understeer. Doing this also reduces braking distances on loose surfaces as it forces the rear axle to stop with the front axle. Don’t speed around blind corners. Corners are fun taken sideways but it’s a huge risk. There could be other vehicles or people or more often than not the road may go in a completely different direction or slope than you were expecting.
**TIP: When coming to a blind corner, give the horn a few short little toots to alert anyone coming the other way that you are there. It won’t give you any more information than you had, but it gives the other driver enough to hopefully prevent an accident. **
Now let’s talk about some of the hazards you will find in the desert and techniques to deal with them. **DEEP SAND **
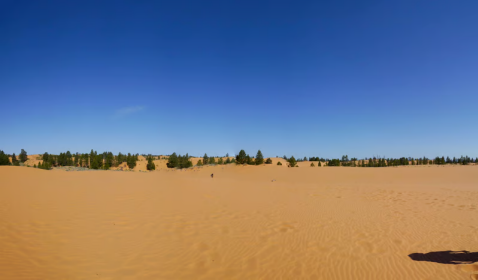
Lower your tire pressure.
Don’t stop in the sand except on top of hills or where there is sufficient runup to get moving again. If you feel yourself digging in, STOP before you make recovery harder.
In soft sand, you will notice your braking and steering will be more and less sensitive respectively. When you put on the brakes in soft sand you will build up little walls of sand in front of the tires and you might be amazed how quickly you will stop.
To steer, make your steering efforts deliberate and smooth. There is no need to saw at the wheel or make small corrections. As long as you are moving forward you’ll steer fine, but the sensitivity of steering will be reduced. It may be difficult to change directions on the sand once you’ve stopped.
In sandy ruts, you may find that you won’t be able to steer at all. This can actually be nice because it means that if you happen to want to go where the ruts are going, then your steering workload just about disappears - Sand Autopilot. However, if you want to get out of the ruts for whatever reason you’ll need a special technique.
To get out of sandy ruts do this.
1. Turn sharply in the direction you want to go, at least 45 degrees of wheel motion, more likely 90. 2. Immediately after this sharp motion, straighten the wheel.
3. Maintain speed and don’t brake.
That’s it. This technique will pop you on top of the rut and drive you would without drama.
Sand is a horsepower eater, keep this in mind as hills that would be easy in high range may require low range. If you are driving something low on power or high on weight you may find that you will need to substitute power for speed.
If you fail to climb a sandy hill, apply the brakes, shift to reverse and back down the hill in a straight line. DO NOT ATTEMPT TO TURN AROUND ON THE HILL.
As you approach the top of the hill you will need to back off the throttle to avoid overshooting the hilltop. It’s a learned skill but you will get a feel for this pretty quickly.
If you get stuck, hopefully, you stopped before you dug yourself in. From here you have a few options.
1. Remove pilled-up sand in front of and behind tires.
2. Let down your tires more. For short periods of time, you can go REALLY low on tire pressure. Single digits if you have to. This will solve about half the stuck issues.
3. Back up if you can and get a run at it. If possible you can do a few short trips back and forth to create a runway to make speed build up a little easier.
4. If you still can’t make forward progress your next tool is traction boards like Maxtrax. This is the single most important recovery tool in the desert. Get at least 4 if solo and make sure you have at least 4 in your group. Dig out around the tires and put them in front of the tires. Or put them where you can’t make any more forward progress by backing up and running at it and driving up onto them as you charge forward.
5. If necessary a second vehicle with a dynamic recovery strap may provide the pop you need. Dynamic straps stretch and use elasticity for recovery. Start small and build up speed and distance as needed. Put a coat or recovery blanket over the strap in the center for safety.
**IMPORTANT SAFETY TIP: A static towing strap is not a recovery strap; Avoid using these for recovery and never build up speed to use these. NEVER ATTACH A RECOVERY STRAP TO A HITCH BALL FOR RECOVERY! THIS CAN AND HAS KILLED. If you don’t have a rated recovery point on the recovering vehicle you can use the hitch receiver and the hitch pin. Put the loop of the strap into the receiver and the pin through the loop. This is less strong than a rated recovery point but far safer and stronger than a hitch ball. **
If you didn’t stop and you’ve dug yourself down to the chassis - you’ve got a long day of digging ahead of you. Dig out your tires enough to fit in traction boards before attempting any recovery techniques.
And again, remember that airing down can be done with a key or stick, but you will need a compressor to air back up once off the sand. Get a good one.
**CLAY **
I covered clay in part 2 but as a reminder
1. If dry it’s like pavement
2. If wet, it’s a big ol’ nope. Seriously, don’t do it. If it’s unavoidable remember that it’s most likely to send you sideways on the slightest of cambers in the road. Keep your wheel speed high and try and clear mud from the treads when you can. It’s going to feel like driving on ice with bald tires.
3. Seriously though, if you can avoid it, please do. The odds of you getting stuck are VERY high and the odds of you tearing up a trail are 100%.
4. Don’t go around it off-trail. For one it ruins the trail, for another, many MANY people get stuck going around only to realize the off-trail is often worse.
**WATER CROSSINGS **
Crossing the dirty devil river
For water crossings, the big threat as mentioned in part 2 is to check for water variability. Water flow rates and levels can change dramatically and very quickly. What was an easy crossing heading in one direction may have changed in flow and depth coming back. Don’t cross if you aren’t sure.
**TIP: If the water is clear it’s a good indication that the surface is hard or rocky. If the water is murky check the entrance and exit of the crossing visually. If it’s wet compact dirt you might be okay, if it’s silty and sandy you will have to check the crossing to be certain. The sand banks may have been left over from a high water event and the bottom could be fine sand that compacts nicely and is relatively safe, or it could be silty and boggy all the way through if it hasn’t flooded in a while. If you can’t see the bottom, checking is best. **
SLICKROCK
Another type of terrain you may encounter is sandstone or slickrock. Despite the name, slickrock is about as grippy a surface as you could hope for and even wet offers grip at least equal to that of pavement. The dangers with slickrock are that it allows you to put your vehicle in dynamically compromising situations. Where normally you would slip before achieving dangerous tilt angles, with slickrock you can literally drive yourself over. Traction - forward, backward and sideways - will always be high enough to create very dynamic load transfers. Be thoughtful for how far you push on slickrock until you are comfortable with how it drives.

getting used to.
As mentioned the desert offers a HUGE variety of terrain types and in most cases what you will get is a mix. River stones, slickrock, basalt, sand, dirt, clay, etc. Keep your eyes forward while driving and watch for any obvious hazards this presents, such as suddenly coming up on sharp basalt which would tear a tire wide open.
SHELF ROADS
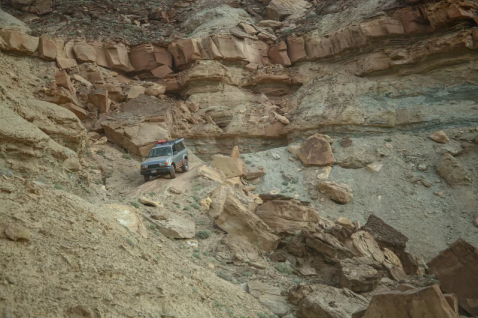
A shelf road is any road cut into a mountain or cliffside and offers exposure to one or more sides of the road. You know, like a shelf. Because mining and cliffs in the desert are like Peanut Butter and jelly and most roads were built by mine companies, you are going to find a lot of shelf roads out here. Some will be minor with occasional and minimal exposure and some will test your nerve. If you aren’t used to this kind of exposure it can take some getting used to. Here are a couple things to know about driving on shelf roads in terms of rules and etiquette as well as a few tips to help you navigate them calm and safe.

Getting comfortable with exposure
1. The road is probably safe. With exceptions for rarely traveled roads or roads damaged by rain, shelf roads are generally strong, sturdy and safe. Take some comfort knowing that the road is wide enough and strong enough to easily support any [reasonable] sized vehicle. A popular shelf road experience is the shafer trail in Canyonlands (above). While it appears daunting, it’s actually a breeze to drive in most any vehicle and there are many possibilities to pass. It’s a thrill, but it’s a safe thrill so long as you remain in control.
2. You probably have more room than you think. Obviously if you are the only one on the road, drive slowly in the middle or on the inside if it makes you feel comfortable but most shelf roads are wide enough.
3. Get comfortable with your vehicle. Unless its brand new, you should be pretty comfortable with how your vehicle drives. You know how close the front is to parked cars when parking, for example, and how much steering you need to get in and out of a space. Paying attention to this on trails can give you a lot of confidence for wheel placement on a shelf road. If you are not confident, have someone spot you around corners you can get gauge actual tire placement and where you think it is. You may find that from inside the car feels closer to the edge than it actually is. Obviously you can’t be overly casual with this but the closer you can get to thinking where your wheels are to where they actually are, the more confident you will be on self roads. NOTE: In 4WD your vehicle will not turn as tightly.
4. Pay attention. Duh, right? Just try not to let your attention wander to the amazing views or conversations inside the car or filming or anything like that. Target fixation says you go where your eyes go.
Passing
1. Generally speaking uphill traffic has the right of way. However, do what is safest and makes the most sense for each given situation. If its practical, it’s nice to have the inside car pass the outside [exposed] car regardless of direction of travel but it will all be situation dependant. In most cases I’ve experienced, the inside car will have a better chance of making room for the outside car to pass. Try and get consensus with the other driver on where people are going to go and who is passing.
2. One rule that you will need to understand is that someone is going to have to pass and it may mean one of you backing up. When backing take your time and have a spotter if you don’t feel comfortable. 3. The inside can be more dangerous than the outside. A drop is scary but the inside tends to hide hazards that are more likely if not more obvious. Ditches, sharp puncture causing rocks, and most dangerously, riding up the inside wall. Keep your head when passing and be sure to look inside and out. There have been more than a few incidents where people, being overcautious, drove UP the inside line and flipped over. The is especially common where the road has a slight camber to the outside or a rock on the inside. You shouldn’t be hugging the inside unless you absolutely have no choice.
Many of these hazards exist elsewhere and if you aren’t new to overlanding you’ve probably got some experience with them. Hopefully there some something in here that helps you feel more confident about desert terrain.
**RECOVERY **
So what happens when you get stuck? What kind of recovery gear should you bring? Im going to make an assumption that you are buying recovery gear for the first time, although you probably already have some of this gear if not all of it and more.
At a minimum every overlanding coming to the desert should have
1. A good compressor. Tire pressure will be the #1 extraction tool.
2. Traction boards - 2 Minimum. 4 Better.
3. A recovery point. Front and rear or at least rear.
4. A snatch strap or dynamic recovery strap.
5. Shackles. At least 2. Soft or hard.
6. A jack. A HiLift is a good all around jack, but some people bring aluminum race jacks or extended length bottle jacks.
7. A jack plate. You will need something to put the jack on so it doesn’t sink into the ground. 8. A shovel. Sometimes traction boards can sub as a shovel, but you should have one anyway. 9. A quality tire repair kit.
10. Basic tool kit for your car. More on that later.
While a more comprehensive recovery kit is always better, understand that you won’t encounter the same kinds of issues as other places and may not need the same kinds of tool. Also you may not be able to use them.
Do you need a winch? If you have one, then you are certainly better prepared, and if you do a lot of solo travel I would strongly consider one. If you travel in a group and don’t do a lot of heavy rock crawling a winch is very unlikely to be used. For one, most of the recovery situations don’t require one and for another…there is nothing to winch off of. In most parts of the desert there wont be winch anchors handy. You can use a deadman or burry your spare tire in a pinch but in many of the places you might get stuck, you may have a hard time with anchor points.
**WHAT TO PACK AND WHAT TO LEAVE **
Some other things that may be common where you are but are unlikely to need in the desert. Again, don’t let me tell you NOT to take something, but my experience has taught me what you probably won’t need.
**LEAVE **
Limb risers
chainsaw/axe
You just won’t run into that much deadfall or overgrowth.
**BRING **
A few things that you may need that you might not be carrying
Extra fuel. Carry at least 70 miles of extra range. There is fuel in even the most remote places but service may not be reliable and/or the cost exorbitant. 70 miles will get you to the next closest gas in a pinch and gives you some contingency.
Extra water. I always carry at least a little more water than I think I will need. Usually it’s not needed to drink or cook with, but for the occasional need to cleanup after a repair, or kitchen spill, or to have as reserve coolant or as backup for people who haven’t read this guide. I carry a 10L Dromedary bag as my backup. Its small enough to slip into my fridge when It starts to empty which keep it full and running efficient. 10 liters, or about 2.5 gallons, is enough water to drink in an emergency and the drom bag has proven crazy durable and safe to toss around all day long. I’ve busted my main water container before and had to use the drom. Redundancy is key. As a bonus its just enough for a quick shower and its black material absorbs the desert sun nicely to heat up your shower water in a few hours.
Jump start pack. You can find these lithium jump start packs for a song these days but do your homework, I’ve had bad luck with a few that work for a little while but stop short when I needed it. Buy a quality unit and be sure.
**COMFORT **
Awning. Honestly, this will be your favorite thing in the world for trailside lunch stops. You will want shade. Its also been the only place of refuge to cook and eat during sudden rain storms which always seem to be my luck to get mid trip. I can get my ARB awning out and setup in about the time it takes for people to get out of their vehicles, and you can fit at least a few chairs under it to keep out of the sun for lunches.

it pretty often. You don’t have to have a fridge but if you are planning on being remote more than a few nights, you should absolutely consider it. Remember to think about how you will power it. It doesn’t have to be fancy, most fridges will run fine off a car battery, even the start battery for quite a long time before their internal protections turn the fridge off to save your battery. I use a solar “generator” which charges as I drive and which I can top off with portable solar panels. But I ran for years running it off a single large start battery with no issues. Remember that you will need a constant supply of power for a fridge, an outlet that is only on when the car is running will not be sufficient to keep your food from spoiling.
**TOOLS **
The tools you bring will depend on your level of skill, and the nature of your vehicle. For Asian vehicles like Toyota and Nissan I recommend a basic 6 point metric socket and box wrench set from 10mm to 19mm, a few socket extensions, a JIS (Japanese Industrial Standard) screwdriver set (philips head works fine, but the screws are most likely JIS, not philips), a few flathead screwdrivers, and an adjustable 10 inch crescent. Depending on how old your USDM vehicle is, it may be SAE or metric. Chances are if you aren’t sure your vehicle probably isn’t that old and it will be metric. Some makes, especially German makes, will require tools like an inverted star drive set. You will be surprised how much this covers. Also be sure to bring some basic electric diagnostic and repair tool. A multi-meter, fuses, spare wire, electrical tape, etc. Its less likely that your vehicle will have faults and more likely that your add-ons like radios, lights, fridge, etc will require some extra attention. I have a video where I go through the tools I bring with me and how I pack them if you want to know more. I’m always modifying this kit to bring more or fewer tools but this kit seems to work for everything I need it for. The tools aren’t really desert specific.
COMMUNICATIONS
This won’t be a comprehensive breakdown of your radio options, as I’ve already written about that, this will be a few things that will help you stay in touch with your convoy, keep others in the loop and get critical safety updates.
The deserts present an opportunity and challenge in communicating by radio. In most cases there is a lot of wide open space for a signal to carry. Something like CB can actually carry fairly well in the open. On the other hand, tight canyons and sharp vertical relief may block even the most advanced signals for going further than you can shout. Out here CB is still a reliable vehicle to vehicle system as long as you are all in group. Advanced SSB or the new FM bands on CB actually are good long distance options if you’re group is so equipped.
Most people will probably stick with GMRS for its clarity, ease of access and simplicity. It’s a good choice but be advised that repeater stations for GMRS basically don’t exist in the desert as of this writing. With a good antenna and a lot of power 20-50 watts) you can expect clear comms for about 5 miles tops. Some GMRS radios have text messaging and position reporting/sharing. These transmissions are weaker than
voice so expect poorer performance from those features.
For long range connections with groups and outside groups HAM is going to be your best bet. The deserts are ideally situation to take advantage of repeater networks and people have. There are both voice and data repeaters in most place you could get a signal. Voice will carry as far as the repeater network, usually across several states, and data nodes allow for location tracking, text and email, weather info and more.
VHF is the more common band for overland travel in the area.
Here are some resources for the area
Arizona
Southern California
Colorado
Nevada
New Mexico
Utah
West Texas
On the last note, I recommend anyone going into the backcountry to have at least one radio that gets the NOAA weather stations. You can usually pick up at least one station with even cheap handheld radios and they give you a lot of good up to date weather info.
ADVICE AND TIPS
Finally, I want to leave you with a few things that I’ve learned that may increase your trip enjoyment.
While you are here for the wide open spaces, don’t neglect the small towns you pass through. Some of them have amazing food, interesting history or just the right kind of vibe to help you slow down and take it in a little more. I’ve always found helpful people who are eager to share their local knowledge which has sometimes led me to places I would have never found otherwise.
**Food **
Remember you will have to consider the lack of humidity and altitude in your cooking and food prep. Food dries out fast so after you’ve made your sandwich, put the bread right back in the bag to keep it from going stale. Water boils at a lower temperature with altitude which may require longer boil times and you might have to alter your recipes for more temp, more dry or more wet ingredients.
**Night driving **
Take extra caution driving at night, road hypnosis is a real thing with long empty roads, especially at night. Night and early morning is also the most active time for wildlife.
I’m of the opinion that if you have additional lighting that you should use it to your advantage. That being said, most auxiliary lights (light bars, spots, etc) are NOT road legal. If you choose to use your auxiliary lighting on the road keep a few things in mind.
NEVER use it if there are other drivers on the road in range of the lights, either coming or going. Be ready to quickly turn your aux lights off at the first signs of traffic.
Because these lights are so bright your eyes will actually adjust to it. Turning it on and off can cause moments of reduced vision, like driving into a tunnel during the day. Use lights only when you think you can keep it on for a while.
You are responsible for using non-road legal equipment.
**Land **
If you haven’t picked up the theme yet, I want to reiterate that you need to respect the land. Life in the desert is rare and fragile and is easily destroyed. You will also likely travel through native lands and reservations which are sovereign nations of their respective tribes. Respect their rules and laws.
Leave it better than you found it and be an ambassador for the hobby.
Generally speaking, just travel with respect for the people and places that will amaze you. I know you will have an amazing experience as you travel through this place I love.
Let me know in the comments anything I missed. What are your tips and advice for traveling in the desert?